TopicId220
This chapter describes how to configure acquisition of photographs using Graphic Library type AF (see Connecting to the camera).
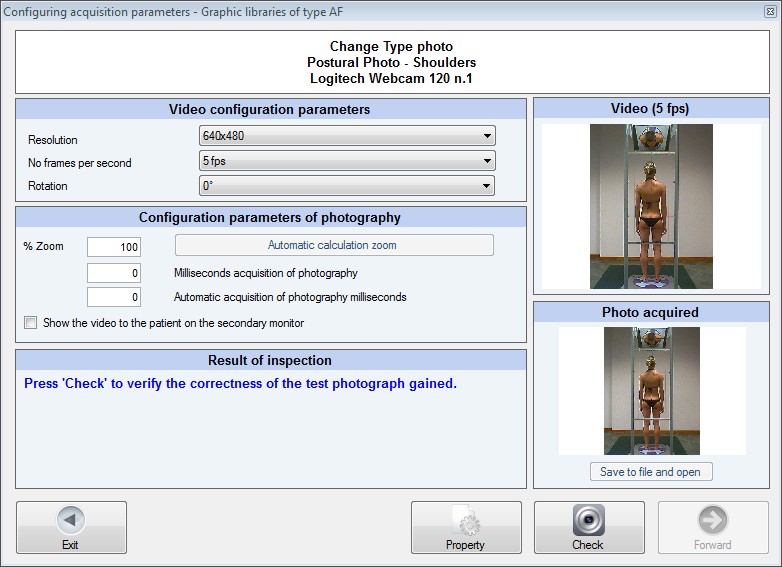
Exemple:
Resolution
This field is used to specify the resolution for the photographs acquired.
The values are expressed in the number of horizontal pixels by vertical pixels, and some secondary parameters are displayed between brackets.
N.B. always use the Check button to check the actual result, see below
N° of photograms per second
This field is used to set the number of photograms per second, during a video link.
During the video link, the number of photograms per second actually received, may be less than specified.
This may be due to the fact that the resolution for the photograms is high and saturates the USB band ("saturates the USB band" means that the number of bits per second required to transfer the images exceeds the maximum number of bits per second that the system can transmit, where the system means: USB cable, USB board, and any USB HUB)
Rotation
This field can be used to set the rotation to be applied to the photo acquired.
The rotation options are:
N.B. always use the Check key to check the actual result, see below
% Zoom
This field allows setting a percentage of the zoom to apply to the photo acquired.
100% is the default value and means that no zoom operation has been performed.
By way of example: specifying 80 means that the photo, at the time of the acquisition, is reduced by 80%; this can be useful if you wish to store the photos with an intermediate resolution compared to those available in the Resolutions field.
The minimum and maximum values for the zoom percentage are 1% and 500% respectively
Automatic zoom calculation button
The button next to the % Zoom is a special button that is only enabled for the camera when using PoData.
When the button is pushed, the optimum % Zoom is calculated in relation to the resolution on the computer monitor, and assuming that the program is used with the maximum main page size set.
Photograph acquisition milliseconds
This field can be used to set the number of milliseconds to wait for the webcam image to stabilise.
Some webcams have automatisms, such as automatic focussing, that require a certain amount of time before the image is stable and perfectly in focus.
When this value is set to a value greater than zero and the photograph acquisition window is used, the acquisition button is disabled for the number of milliseconds set.
The minimum and maximum number of milliseconds that can be set are 0 and 2000 respectively
Automatic photograph acquisition milliseconds
This field is only used and enabled for Postural Photo.
The purpose of this field is identical to that described before, but relates to multiple acquisition by all the webcams connected up.
When this field is set at a value exceeding zero and you use multiple acquisition, before a photograph is acquired automatically, acquisition stays on hold for the number of milliseconds set.
The minimum and maximum number of milliseconds that can be set are 0 and 2000 respectively
Result of inspection
The check status is displayed according to a three-color code in the bottom right of the window:
Example of check successfully completed:
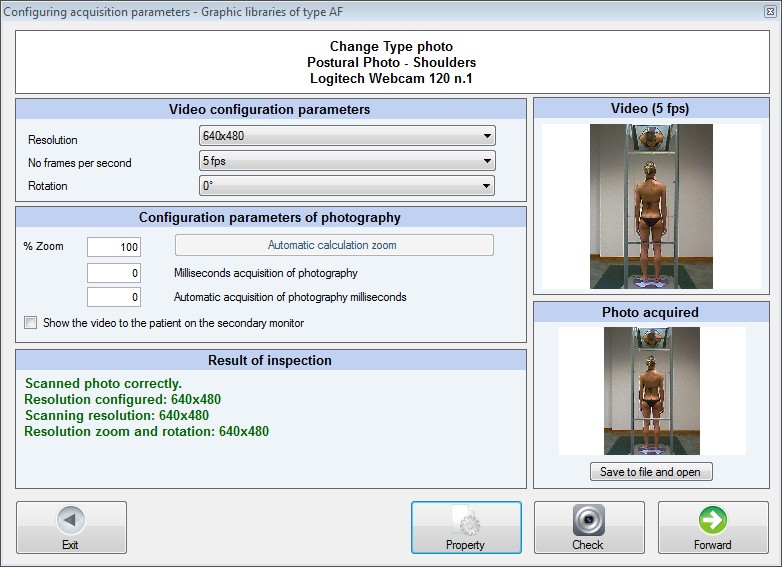
Video
The camera video stream is displayed in the top right of the window. The stream depends on the selections made and confirmed by clicking the Check control.
Photo acquired
The test photo acquired is displayed in the bottom right of the window. This test photo depends on the selections made and confirmed by pressing the Check control.
This button saves to a file the test photo acquired and opens it.
Check Button
Clicking this button allows checking the result of the selections made, viewing the video stream and performing a photo acquisition test.
This can be useful because the selections described above depend on the physical characteristics of the camera: in some cases, a particular combination of selections may not allow a proper photo acquisition.
If the video stream or the test photo in the right-side of the window does not look correct, try using another combination of resolution and color depth selections.
The result of each check is displayed in the bottom left of the window.
For any problems see Diagnostics of the GPS system